


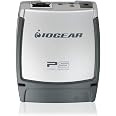
IOGEAR 1-Port USB 2.0 Print Server, GPSU21

Description
📡 Print Smart, Print Anywhere!
- ROBUST PROTOCOL SUPPORT - Compatible with DHCP and multiple network protocols for versatile connectivity options.
- UNIVERSAL COMPATIBILITY - Supports both USB 2.0 and 1.1 printers, ensuring you can connect a wide range of devices.
- REMOTE PRINTING CAPABILITY - Print from anywhere on the network or even across the Internet, making remote work a breeze.
- SEAMLESS NETWORK INTEGRATION - Easily connects your USB printer to any network, allowing multiple users to print effortlessly.
- EXPERT SUPPORT AT YOUR FINGERTIPS - Enjoy peace of mind with 3 years of free US-based technical support.
The IOGEAR 1-Port USB 2.0 Print Server (GPSU21) is a compact and efficient solution for connecting USB printers to a network, enabling multiple computers to share a single printer. With support for various network protocols and remote printing capabilities, it’s perfect for both home and office environments. Backed by a 3-year warranty and lifetime technical support, this print server ensures reliable performance and user satisfaction.


Specifications
| National Stock Number | 7025-01-608-1027 |
| Brand | IOGEAR |
| Item model number | GPSU21 |
| Item Weight | 1.92 ounces |
| Product Dimensions | 2.5 x 1 x 2 inches |
| Item Dimensions LxWxH | 2.5 x 1 x 2 inches |
| Color | SILVER COLOR |
| Department | COMPUTER-OTHER -> COMPUTER ACCESSORIES |
| Manufacturer | IOGEAR |
| Language | English |
| ASIN | B000FW60FW |
| Country of Origin | China |
| National Stock Number | 7025-01-608-1027 |
| Is Discontinued By Manufacturer | No |
| Date First Available | May 30, 2006 |
Have a Question? See What Others Asked
Reviews
S**C
Easy install on Vista & Win 7 64 bit UPDATED
I read others say it's tricky to install but the instructions are straightforward and easy. I used this method for both a Vista and Windows 7 64 bit machine:1) Make sure your printer is compatible. See www.iogear(dot)com/files/pdf/GPSU21_PrinterCompatibilityList.pdf2) Make sure you have installed the printer drivers on your computer. This is only a server, you must still have the drivers installed.3) Insert the CD and run the Wizard. If prompted by Windows, grant permissions and Unblock firewall.4) If you need to configure a static IP you can, otherwise just click through the steps.5) When you get to where you select a printer, if the printer you want is not on the list (mine wasn't) then click Add New Printer and (as the instructions say, but this is important to not miss)"If asked which port to use, choose LPT1 but DO NOT print a test page yet."6) Just click through to Finish.You can now go to Control Panel and print a test page if you want.Works fine. I have two notebooks that both now have access to the printer without difficulty.UPDATE 7/16/13:Some folks had mentioned the print server stopped working. I had that too and here's what the problem was - I had reset my wifi router. So the IP my computers had for the print server port(which is set during the print server CD setup) no longer matched the new IP the router assigned. This can easily be remedied by setting up the print server with a static IP during the wizard install. Just follow the instructions in the manual. Then I went to my wifi router admin page and set aside that IP for the print server. The process to do this varies per router, but you should be able to find it without too much trouble. On my Linksys E2000 this is done on the Admin's Setup page, under DHCP Server Settings and selecting DHCP Reservation. Afterwards the IP address port assigned to the print server on your computer will always match the one assigned by your router even if you have a power outage or need to reset your router. This whole process literally takes a minute or two.The print server still works great!
C**C
Manual install works great
Moments after my Iogear GPSU21 arrived, I had it up & running for an HP DeskJet 970Cse installed and accessed from a Windows 7 32-bit laptop. Installing the network printer on another laptop with Windows 7 64-bit was another few minutes once I had installed the printer correctly with a direct USB connection to that box. This morning I just finished adding it to my Windows XP SP3 desktop system but with a slightly different procedure.The key to all these stress-free results was full manual installation. A good working knowledge of general networking and Windows networking really helps.Other "checklists for successful installation" have already been posted, but I'll summarize my findings briefly since they do vary slightly from what I had read in the reviews already posted:(1) When you first install the Iogear GPUS21, find out what IP address your router assigned. Then open that address with your browser, go the TCP/IP section to turn off DHCP and assign a permanent IP address to the device.(2) Ensure the printer is already installed (and works) with a direct USB connection to the intended client system. Then move the USB cable over to the Iogear for the following steps.(3) For Windows 7, add a (networked) printer and specify the TCP/IP option. Enter the IP address from step (1). Click through the rest of the wizard and print a test page.(4) For my Windows XP system, the add printer wizard did not offer the TCP/IP option. So I selected "browse for a printer" option and sure enough the print server and printer were displayed. I selected it and seconds later printed a test page. (This path probably would have worked equally well on Windows 7 with less typing.)In summary, the Iogear's web-based configuration page looks professional and has options for configuring Netware, SNMP, TCP/IP, AppleTalk and SMB interfaces. There is no "help page" but if you are familiar with these items then configuring it is a snap. Over on the client side (for PC-Windows anyway) the Iogear server appears fully compatible with built-in functionality as configured with the Add Printer wizard.
Common Questions
Trustpilot
2 days ago
1 month ago
